Showing posts with label Silver. Show all posts

Recycle Your Mani!

Thursday, December 9, 2010
Good morning! Do you know that feeling when you're wearing a manicure for one day (or maybe a couple of hours) and you're already bored with it? I have that a lot. Sometimes I put over another coat of glitter top coat or some pretty sheer polish while other days I use Konad or nail art stickers. For the Silver Snow mani I used stickers.

Silver Snow Stickers

See? You can leave your manicure on for another day! ;-) These nail art stickers are from Essence.

What do you when you're bored of a manicure? Do you take it off or do you recycle it?

Thanks for visiting!
Michelle

Silver Snow

Friday, December 3, 2010
Hey everyone! So this past week the temperature has been dropping like crazy and it even started to snow, what to me is quite unlikely this time of year. November is just over and it already is like Winter Wonderland out there! Not that I complain - I love a white world!

For todays manicure I decided to use the snow as my inspiration but to be honest, it isn't much of a manicure. I've slapped some polish on a sponge and that's it.

Silver Snow

Ha, metallic snow! My base colour is CND Asphalt, a dark grey creme. I know I've said this a whole lot before but I love how the CND polishes apply, they're all so smooth! After that I took out a normal household / kitchen sponge (in the Netherlands we have these ugly yellow one) and used Orly Shine for sponging. Orly Shine is my favourite silver, it's not dense looking but more scattered.. Makes it perfect for my metallic snow. The household sponges work good for sponging like this and best thing: they're el cheapo! I cut them into small pieces so it's easier to work with and you don't make a mess of all your fingers. Make up sponges also work good and don't have to be that expensive.

While typing this post I was thinking how cool it would be to have metallic coloured snow. You know, silver, gold, bronze... Woahhh. It would be so pretty!

Take care dear readers, thanks for visiting!
Michelle

OPI Designer Series - Coronation

Tuesday, November 30, 2010
Hey guys! I've been really posting a LOT of the OPI Designer Series, I'm sorry for that but I can't stop myself. The Designer Series are my favourite OPI polishes ever and like I said to a fellow nailblogger on Twitter, it's almost like Pokémon: you gotta catch 'em all. I'm not fond of the pinks and reds but the other ones are definitely my kind of thing.

One that is more than my kind of thing is Coronation.

OPI DS Coronation

I love silver polishes. People who don't care as much about polish as I (and you!) do will say: 'why do you own six of the same colours?' but to me they are all different. I rarely show them but finally, the day has come to show off a very pretty silver.

Coronation isn't a regular silver polish. It's more of a glitter top coat: the base is transparent and stuffed with silver holographic glitter. The glitters are very dense but I still needed three coats for this one to be opaque. Is that a bad thing? NO! This way you can also use Coronation as a glitter topper over other polish. Win! Another plus: the polish isn't gritty.

OPI DS Coronation

The sun wasn't liking me taking pictures so unfortunately I wasn't able to catch the holographic effect that good. I will repost this one in summer, I promise! This week I showed you two pretty holo's: Glamour and Original, both from the Designer Series, but Coronation has a different holo. It isn't that 'rainbowy', it's like the glitters are working individual. It's gorgeous.

OPI DS Coronation

Coronation is still available at TransDesign and, I believe, in stores.

By the way, have you heard the news about OPI? Yesterday it was announced OPI was sold to Coty. Now this is for most people not a matter of life and death but it does feels strange that a cruelty free brand is bought by a company that still uses animals for testing. To me anyway.

How do you feel about OPI being sold to Coty and does this affect your liking?

Take care and thanks for visiting!
Michelle

OPI Designer Series - Original

Sunday, November 28, 2010
Good morning chicas! I could write a whole post about my lemmings but because that doesn't sound that interesting to me I'm only showing you the ones I have been able to get. I'm lemming a lot but mostly it sticks to 'very interesting - if I can get it I'll get it' instead of putting a lot of effort in getting it. Don't get me wrong, I love a good polish hunt but there aren't a lot of polishes around that are really a must-have for me.

The one I'm showing you today was a lemming but not a must-have. I looked on eBay for it but the crazy prices were a little too much for me so I decided to not buy it. Now that was a good choice! OPI DS Original became available on TransDesign - and became a must-have, easy to get, you know what I mean? - and I scored it for $7.25. Ha, no crazy prices for me! :-)

OPI DS Original

OPI DS Original is a cool lavender polish. In lowlight it looks like lavender infused with some kind of silvery sparkle, very pretty. The picture above is taken in the shade, you can see there's a little bit of holographic action going on but of course not that much as in the sun (ya rly!).

OPI DS Original

Ahhhh, there is the action. Original has holographic sparkles, a little scattered around and definitely not as dense as my Nfu.Oh's or, another example, China Glaze OMG. Do I mind? Hell no! It's absolutely gorgeous and I am very happy this one belongs to me now.

Like the other DS polishes Original was a little thin, not watery though. I needed three coats to reach a smooth and opaque result, and for the impatient ones (like myself): it dries pretty fast. I'm not wearing a top coat because it already is a very shiny, glossy polish.

OPI DS Original

Original is discontinued but you can always check eBay - some sellers don't ask a lot for this one. TransDesign stopped selling Original but maybe other etailers still do.

Enjoy the last bit of your weekend and take care!
Michelle

Two Pretties make a good Pair

Saturday, October 23, 2010
Morning people! Today I want to show you two polishes from the new China Glaze Holiday Collection called 'Tis the Season to be Naughty and Nice. I really wanted Party Hearty from the beginning because I love these kinds of glitter but when I saw Jolly Holly I just couldn't say no. It's green and it's gorgeous, everyone would've said yes!

China Glaze Jolly Holly Party Hearty 'Tis the season to be naughty and nice holiday 2010

This is Jolly Holly, an amazing green shimmery polish. The shimmer is blue and gold and it's awesome! Application was really good and it was also opaque after one coat. ONE COAT!

China Glaze Jolly Holly Party Hearty 'Tis the season to be naughty and nice holiday 2010

Jolly Holly topped with one coat of Party Hearty, no top coat. Party Hearty is such a funky glitter! I can see small silver and gold glitter and they've also put larger red and green glitter in it, all in a clear base. Application wise it was good, I don't like to polish my nails with glitters but this one wasn't that uncontrollable.

The 2010 Holiday Collection from China Glaze also offers you some sweet gift sets that are available at Trans Design and will be at Enchantra. How do you feel about this new Holiday collection?

Thanks for stopping by!
Michelle

Glitter Puke

Wednesday, September 22, 2010
Hey everyone! I really like glitter polish but sometimes I don't want to wear a full mani with glitters so I always try to find something for it. Sometimes I do a glitter french or a moon manicure but last time I tried something different.

Diamond Cosmetics I'm Raven About You China Glaze Spellbound Misa Confection Section Essie Silver Bullions Glitter Manicure Nail Design

It's like someone puked glitters over my nails!

I like it when glitters pop out and have a contrasting colour underneath so when I was picking out colours I decided to go for a black background and silver glitter. The black I used is Diamond Cosmetics I'm Raven About You, one of my favourite blacks because it's not watery, it's opaque and even in two coats.

Diamond Cosmetics I'm Raven About You China Glaze Spellbound Misa Confection Section Essie Silver Bullions Glitter Manicure Nail Design

After applying the base colour I used the Essence Silver striper and started to create stripes from the tip of my nail towards the cuticle. All these stripes variate in length. When that was done I used Essie Silver Bullions and applied this pretty over all the stripes. You can use a striper for this but Silver Bullions is not that dense so I used the brush.

When done with that the next glitter that I applied was from China Glaze, Spellbound. I love this one and the orange glitters that are in it make this polish for me a special one. And last, but certainly not least, all this was topped with Misa Confection Section. There you have it, glitter puke.

Diamond Cosmetics I'm Raven About You China Glaze Spellbound Misa Confection Section Essie Silver Bullions Glitter Manicure Nail Design

I expected this to be all bumpy but that wasn't the case after I topped it with China Glaze Fast Forward top coat. Nice! This is a manicure I'm looking forward creating in different colours, I absolutely love it!

Thanks for stopping by! :-)
Michelle

FingerPaints - Easel-y Entertained

Thursday, September 16, 2010
Hey guys! Yesterday I showed you Borghese Stellar Notte, a polish that I got from dear Karrie, and today I'm also showing you a polish she gave me! After I finished up the post about Stellar Notte, the mailman arrived and gave me a the second swap box, full of goodies! The ones that follow me on twitter have seen what's in it and for the ones who haven't seen it, it will be a surprise. I'm really happy with every single item that was in the box and I'll be showing you lots of new things. :-)

FingerPaints Easel-y Entertained

This is Easel-y Entertained from FingerPaints, a brand I've never tried before. The bottle looks really good to me, very simple (I like it when things are simple). Easel-y Entertained is a blue (plus a teeny tiny hint of purple - not 'blurple' though) glitter in a clear base but that's not all... No! It also contains silver glitter, not as much as the blue glitter, but it's definitely noticable.

FingerPaints Easel-y Entertained

This is Easel-y Entertained in the sun and it isn't that noticable in my picture, it really sparkles! It's absolutely gorgeous. Application was okay, even though it has a clear base it's easily buildable to get an opaque result. I needed three coats and I'm also wearing a top coat because it dries a little bit matte. It dried a little slow but nothing a quick dry top coat can't help!

I am very happy with this one, it reminds me of the night sky in summer. Definitely a shade I'll be wearing a lot, so once again: thanks Karrie! You absolutely know what I like (and you're spoiling me)! :-)

Have a great day everyone and take care!
Michelle

Nail Art Tutorial: Ruffian Manicure

Saturday, July 31, 2010
Hey all! Today I'd like to show you how you can create a Ruffian freehand. It's not that hard and all you need is a bit of patience, a steady hand and maybe a little bit of practice!

First you start with cleaning your nails and applying a base coat. After that it's colour picking time! I like Ruffians with metallic shades, matte shades and contrasting shades but this is really your choice.

Nail Art Tutorial Ruffian Manicure China Glaze Millennium

I picked China Glaze Millennium as my base, a silver metallic. Let it dry. Metallic shades dry pretty quickly but when you're using a polish that doesn't dries that quickly make sure you wait a few minutes before starting your Ruffian. You don't want to have polish mixing or pick up your base colour with the brush.

Dry? Let's start with step 1.
Like applying nail polish on your entire nail, you place a drop of polish on the center of your nail. Push the drop of polish a little bit down so you can decide where the Ruffian ends. After that you move your brush upwards, creating a vertical line. I use H&M Love at First Sight as my second colour.

Step 2: Start again on the left (or right) side. Pick the brush and swipe the polish upwards along the curve of the nail. Make sure the whole side is covered with nail polish.

Step 3: Repeat step 2 only on the other side.

Nail Art Tutorial Ruffian Manicure

Nail Art Tutorial Ruffian Manicure

Nail Art Tutorial Ruffian Manicure

See how easy it basically is? You create the Ruffian just like you normally paint your nails, you only start on a higher point of your nail. If you are scared to do this freehand you can always use french tip guides. When you do so you must let the base colour dry completely, otherwise you'll pull off all the polish. I'm not a big fan of tip guides because they tend to get all sticky on my nails and they leave me with glue on my nails but if it works for you, why not?!

After that, seal with a top coat and this is the result:

Nail Art Tutorial Ruffian Manicure

Hope this was helpful and don't forget: practice makes perfect!

Subtle Silver Konad

Tuesday, July 27, 2010
Hello everyone! I haven't done much Konad the past weeks but I really like to use it. It's easy, quick and the designs are very nice and divers. If you haven't used Konad before you can always order a set or look out for the Essence Stampy Set, a cheaper version that is great for trying out.

Diamond Cosmetics Matte Smoke stamped with Orly Shine and Konad Imageplate M60

Normally my designs aren't this subtle, I like it when the Konad pops out, but this one I really liked. I'm wearing Diamond Cosmetics Matte Smoke as my base colour, a matte grey. I needed two coats to get it opaque and even. As my stamping polish I used Orly Shine from the Foil FX collection. The polishes from this collection are great for stamping just like the Romantiques and Khromes from China Glaze. The plate I used is Konad imageplate M60.

What is your take on subtle Konad designs like these?
Have a nice day everyone!

Cheese gone bad.

Saturday, July 24, 2010
Hi everyone! I'm back a little early because I won't have time tomorrow. The plan for tomorrow is to marble my nails and then help my friend Janina with setting up stuff for her birthday later that day. Since I'm a lazy person I need a lot of time getting ready so I really need the whole morning for that.

Nail Art Color Club Almost Famous with Essence Nail Art Striper black and silver and dotting tool

Showing you this manicure feels kind of weird. I wasn't aiming for a super cute or awesome design and I really don't know what it's supposed to be but I do like it. The yellow is Color Club Almost Famous, a bright yellow creme that reminds me of cabs and school buses. I love it and will wear this regularly in the summer. Application was fine, a bit streaky but manageable. After three coats it was opaque. For the black and silver stripes I used my Essence stripers. The dots are made with a dotting tool.

About the name: I wanted to call this one yellow but that didn't fit! I asked around and Michèle came with wonderful suggestions so I picked this one.

Nail Art Color Club Almost Famous with Essence Nail Art Striper black and silver and dotting tool

What do you think?

Thanks for visiting and have a great day tomorrow!

Tropical Turquoise

Sunday, July 18, 2010
Hi everyone! Once in a while I like to create nail art I'd never wear or that looks really difficult to me. Linda showed me a nail magazine that has some pretty nice tutorials and I decided to make the Tropical Turquoise one yesterday evening. You can find the tutorial here. Now, I know it's in Dutch but they've created a very clear and easy to follow movie so it doesn't matter which language you speak.

The result of my creativeness (and boredom) last night:

Nail Art Design Essence Stripers Black Silver Dottingtool Charlotte Russe Essie Silver Bullions China Glaze Towel Boy Toy

Tropical Turquoise Tropical Turquoise

You can click the pictures for an enlargement. I think it came out pretty nice. My nails are a little too short so I had to fill them up more than I'd like but it looks fun and I think I'll create a little bit more of these kind of designs. It's really fun to do!
Polishes
I started off using China Glaze Towel Boy Toy, topped that with the nameless green of Charlotte Russe and Essie Silver Bullions on top of those two. I've used the Essence stripers for the flowers. For a finishing touch I've used the aqua and AB coloured rhinestones from Dollar Nail Art.

Would you consider creating a design like this yourself or would you rather have someone else doing this for you? Why?

Have a nice day and see you later!

OPI - Have You Seen my Limo?

Thursday, July 15, 2010
Hi everyone! How are you all doing? I'm having a bit of a headache the past two days, not sure where it comes from but it sucks so hopefully it'll be over soon. For today I want to show you OPI's Have You Seen my Limo?. I have ordered this one a while ago on Ebay and forgot about it until I found it back recently.

OPI Have You Seen my Limo? Holiday in Hollywood 2007

Have You Seen my Limo? is from OPI's Holiday in Hollywood Collection (holiday 2007). I like this shade the best out of the collection, it's the most unique in my opinion. Have You Seen my Limo? has a deep purple base with silver and green shimmer. It's a fab duochrome, it turns from reddish purple to greenish plum.

OPI Have You Seen my Limo? Holiday in Hollywood 2007

Application was fine. It took three coats to be opaque and that's a good thing because I thought it would be pretty sheer, you know I don't like sheers. After finding out this polish looks so darn good I smack myself on the head - I really need to USE polishes instead of looking at them. 

Have a nice day!

OPI Designer Series - Diamond

Wednesday, June 30, 2010
Hey everyone! How are you all doing? The weather here in the Netherlands has been really good, maybe a little too good, because the temperature is around the 30 degrees Celsius every day. I'm almost burning up here! The sun is really great for wearing holographic polishes so today I'll show you another one. OPI DS Diamond is one of my favourite polishes, I wear it quite often.

Most polishes of the Designer Series are holographic or have a really great depth and sparkle in them. Diamond has a touch of holographic in it but it isn't apparent at all. It's really subtle.

OPI Designer Series Diamond

Diamond in sunlight, three coats

See how subtle it is? Other than being holo, Diamond is a weird shade. It's not silver, it's not lilac, it's hanging in between. So I'll be describing this one as a silvery, dusty lilac. Application was good like all the DS polishes I own. They're easy to work with and they all apply really even.

In the shade this is really toned down and it isn't that sparkly anymore. It's really dusty and to me very work appropriate. I'm loving it both ways but it's sooooo gorgeous in sunlight.

OPI Designer Series Diamond

Diamond in the shade, three coats

How do you feel about Diamond?

Grey Ruffian

Saturday, June 12, 2010
Hi all! Yesterday I was thinking of doing a ruffian again. I've done a couple in the past but that was quite a long time ago so I had to do one again.

Nail Art Design Grey Ruffian Manicure China Glaze Awaken OPI Suzi Skies in the Pyrenees Suede Essence Nail Art Striper

First I painted my nails with China Glaze Awaken. Awaken is a darker grey metallic from the Romantique collection and it's also great for Konad. I used OPI's Suzi Skies in the Pyrenees suede as my second colour. After that I used the silver striper from Essence.

Not much to say really except I like ruffians. :)
Have a good saturday!

OPI - Damone Roberts 1968

Wednesday, June 2, 2010
Hi dear reader!

So you've all heard of OPI having a rerelease of the limited Damone Roberts and I just had to have it. I love greens so when Ange from Scandalously Polished tweeted she had a few, I responded and a week later it was mine! Damone Roberts is the eyebrow king in Hollywood (I didn't know) and this shade is based on the wall colors of his salon (another thing I didn't know).

OPI Damone Roberts 1968 Pastel Mint Green Limited Edition Rerelease

It's a pastel mint green creme and I do like these shades, but it didn't get me all hyper and dancing around the room. It is a nice addition to the collection though. :) Application was fine, not the best I had from OPI but it was managable. I'm wearing three coats in the picture. I used my silver Essence striper and light green rhinestones to pimp up this baby - I needed a little nail art in my life.

Thanks for visiting and have a nice day!
Michelle

Lady Gaga Inspired Nails

Sunday, March 28, 2010
Hi dear reader!
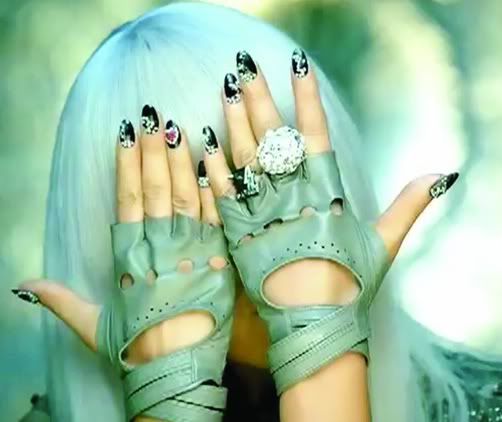
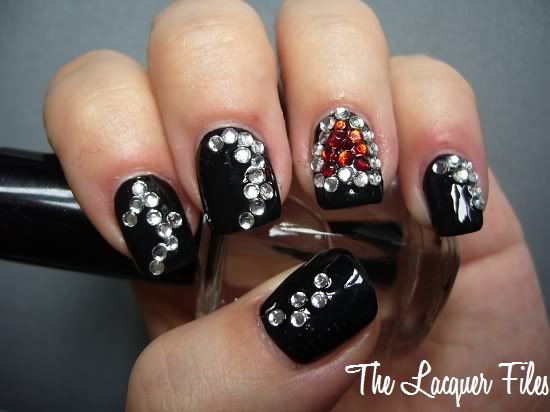
I got something fun for you today! You all remember the Gaga Nails in Pokerface, right? The black polished, heavily studded pretties? Here's what they looked like:


I created this today! It's been in my mind creating nail art inspired by Gaga for a while now because she wears the most prettiest nail art in her videos. I received my rhinestones yesterday from DNA and today is my free day, so I had something to do. :)


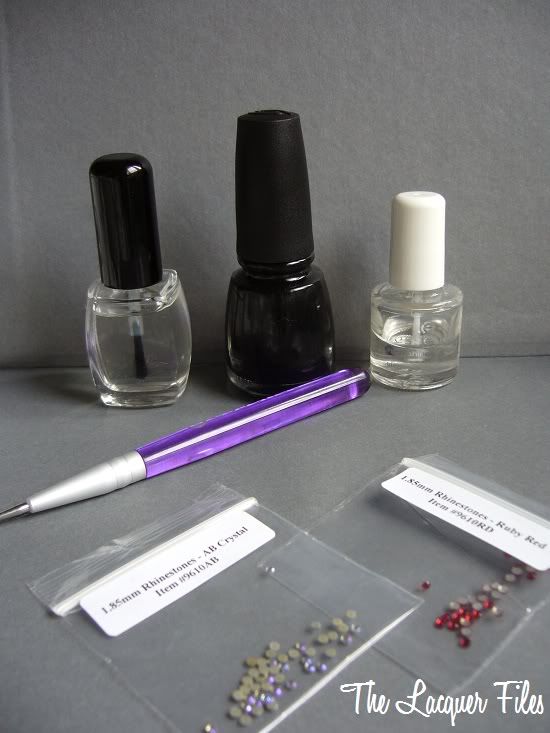
I used:
- CG Liquid Leather as my base colour
- Essence dotter for placing my rhinestones
- Ruby Red and Crystal rhinestones
- Essence topcoat as my replacement for glue ;)
- David topcoat to make it all shiny!

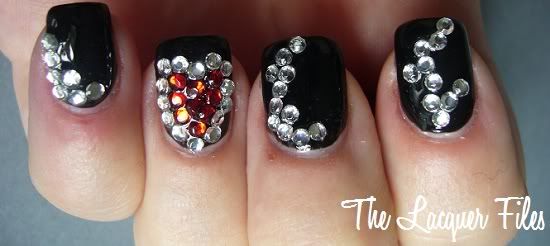
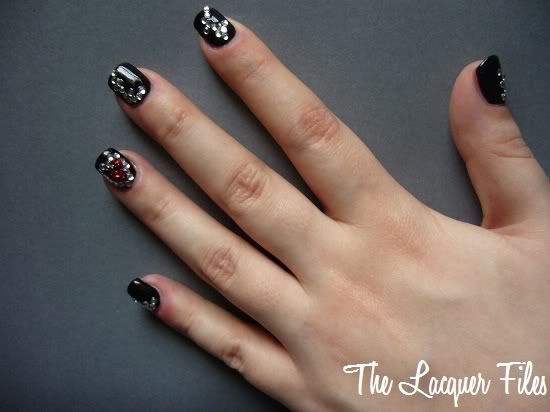
Here's how it turned out:


Okay, it's kind of... Blingy? Definitly fun to wear at a party but I'd never wear it on a normal day. I had the most CRAZY experience with David, he made my polish all bubbly! :(

Who or what is your inspiration for creating nail art?

Thanks for visiting!
Michelle

NOTD: China Glaze - Stellar

Friday, March 5, 2010

Hi dear reader!
I'm so busy with school and my internship so therefore this post is a quicky. I'm testing my Orly Bonder and I'm wearing China Glaze Stellar so I'm hoping this will stay on till monday.. Fingers crossed!

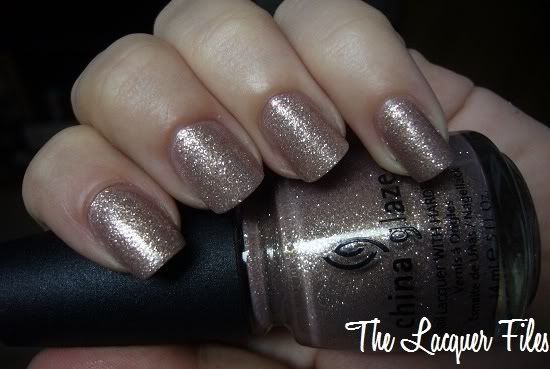
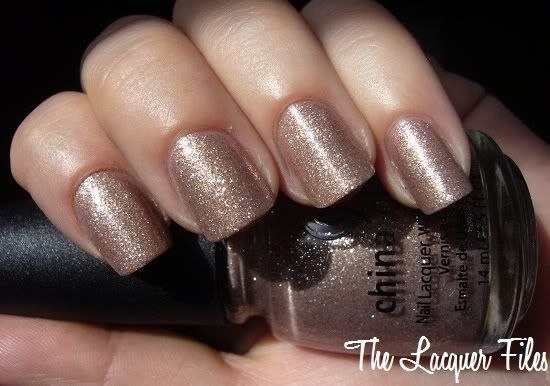
Stellar is a very pretty glitter polish. The base colour is beige/light brown and it's fully packed with bronze and silver glitter. Really dense! Too bad the sun was gone this afternoon, but this is how it looks in sunlight:


Pretty darn sweet, eh!

Thanks for visiting, have a great weekend!
Michelle

Ciaté: Gold with extra Bling

Thursday, March 4, 2010

Hi dear reader!
I received my Ciaté order today from ABC Beauty. The bottles are soooo cute, I love the tiny bows on them! I tried the gold polish, Ladylike Luxe, first because I'm definitly not fond of gold and most the time it looks really weird on me.

The polish applied very nice and it has a nice brush. Not as wide as the OPI brush but not as small as a China Glaze brush: perfect in between. :) You see three coats of Ladylike Luxe on the picture.

It's a nice shimmery gold and I know that lots of people will be very happy with it but things don't change and I'm still not fond of it. I think I would be if this would look good on me, but it doesn't. Too bad. This will end up in the swap box for sure! To make it even worse I put on some gem stickers I got as a thank you gift with another order and I had a huge laugh. It's so not me! I might wear my leopard stockings and my over the knee leather boots to go with it, not forgetting some crazy golden hoolahoop earrings - on my way to the towns fair! :') No no no, I'm joking.

Ready???


Haha. That's all I'm showing you today, I'm working on some spring mani's!
Thanks for visiting!
Michelle

With sun comes... Holo!

Monday, March 1, 2010
Hi dear reader!
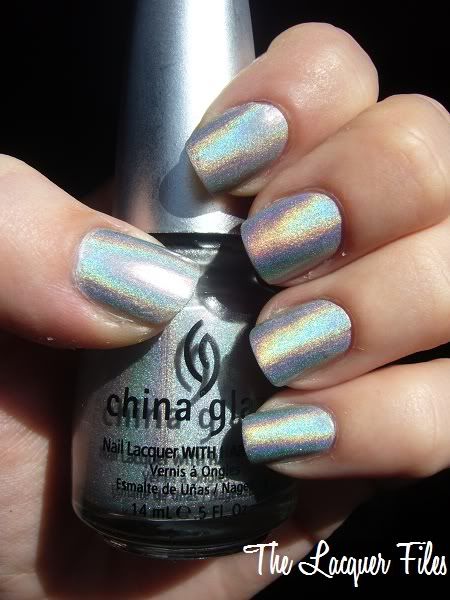
I was so amazed to see the sun, I just had to polish my nails with a holo. I chose China Glaze - OMG for today of the OMG collection. The thing I like about the China Glaze holo's is that they aren't in your face holo. I like those holo's on other people, not me! I'm not going to tell more; you've probably seen and heard it all, so let's go to the pictures.


Whieee! It's so funky.


Okay, I know, this one looks like the first picture but I was so happy with the sun shining that I must place this one too.


Up close!

What's your favourite holo?
Have a nice day!
Michelle

Recycle, Stripers, Studs and Rhinestones

Thursday, February 25, 2010

Hi dear reader!
How are you doing today? I'm feeling much better and I even wanted to play around with my nail art stuff, so that's a sign of getting better! ;) I told you yesterday I received a small nail art package, I've ordered it on Dollar Nail Art with a large group of ladies from the Dutch nail topic. I received black rhinestones, three kinds of studs and hex glitters and I've actually placed a new order because these are all so cute!

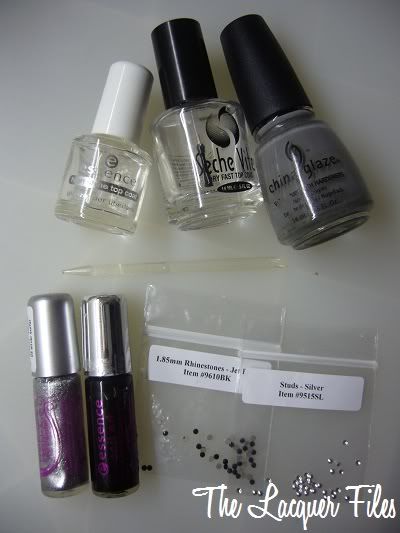
On the picture above you see what I've used for today's mani: China Glaze Recycle, Essence stripers Silver and Black, black rhinestones, silver round studs, a plastic stick, Essence top coat and Seche Vite.

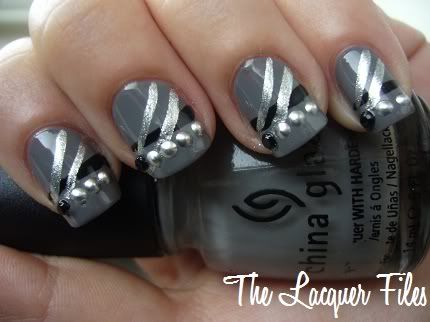
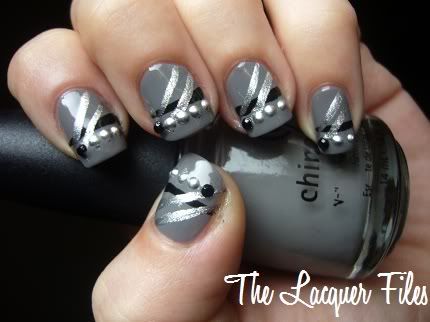
I thought Recycle would make a neat base colour and so it did! It combines pretty good with the black and silver. I had some issues with it first, the formula was really thick and almost impossible to polish with but with a few drops of Seche Restore it was perfect! I made a three lines on my nails with the Essence stripers and placed the rhinestones and studs on my nail, using the plastic stick and the Essence top coat. I didn't use Seche Vite for it because I'm so slow with this and it would be dry after I placed my first stud. :') I used Seche to top it all off because it's a thick top coat and it really bugs me when I feel glitters, or in this case studs, on my nails. It made it a little less horrid. ;)

So, here are the pictures of the final result:


Neat eh? I'm still practicing with the stripers, sometimes I get really thick lines and that's something I want to avoid!


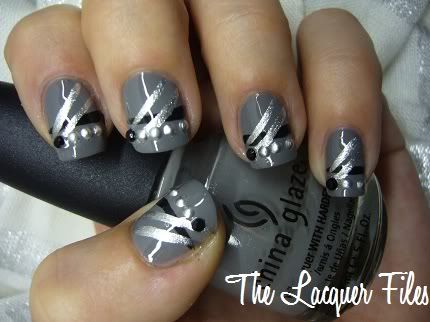
Tadaa! Wow, you've actually seen something very special today: the first time I'm showing my thumb on my blog! I never make pictures of it because recently my nail broke and now it's pretty grown back but it still makes me sad.


This one is shot in artificial light. Why? I don't know, I just like my nails now.

After all this was a succesful day for me and my nail art skills. ;)
What do you think?

Have a nice thursday!
Michelle
© The Lacquer Files | Disclaimer | Want to use my content? Email me first!

This work is licensed under a Creative Commons Attribution-NonCommercial-NoDerivs 3.0 Unported License.