Kiko - #255

Tuesday, August 31, 2010
Kiko Nail Lacquer 255 Purple Microglitter

Hi guys! Today I want to show you a polish that I scored in Germany while I was on vacation. The reason we went to Germany was actually because of this brand. In Oberhausen there is a Kiko store and it's packed with everything you need for your nails but also offers a lot of make up, brushes and accessories.

Kiko Nail Lacquer 255 Purple Microglitter

Kiko does name their polishes but these names are not that original. The bottle tells you what number the polish is and you can look it up on their website. The polish I'm showing you, #255, is called Purple Microglitter and yes, there is lots of microglitter in it! I had a little bit of trouble swatching this pretty but the base is a dark purple and it's packed with holographic microglitter.

Kiko Nail Lacquer 255 Purple Microglitter

The glitter is also visible in shade! It's not that present as it is in the sun but it does give a great depth to the polish. The only downside is that the polish is very gritty, I needed two coats of top coat to make it all smooth again. I'm wearing two coats of polish in the pictures and applying it was very easy. The brush is not too thin or too wide and the formula of the polish is also good.

Now, what more is there to say? Kiko polishes cost €1,90 and for this amazing small price you get a great polish, colour and application wise. If you see a Kiko store once, don't hesitate and enter! :-)
Have a nice day!
Michelle

A Beginners Nail Art Stash - Stamping

Hi everyone! A while back someone asked me what you need when you want to begin with nail art. Now, this has been soooo long ago I don't remember who asked (sorry) and it took ages to create this post (sorry) but finally, here it is! Please note that this post is based on my own experiences and opinions - there is no right or wrong when you're starting with nail art.

Konad Fauxnad Bundle Monster Beginners Stash how to start with stamping

Stamping

Stamping is a technique where you use pre-designed images, polish and a stamp to decorate your nails. A brand that is well known for offering stamping products is Konad but other brands like Essence and Herôme have also added stamping products to their assortment.

What do you need?

- Stamp
- Scraper / Plastic Card
- Imageplates
- (Special) Polish

Stamp

A stamp is needed to pick up the design from the imageplate. There are small stamps, larger stamps and double sided stamps. Most (starter) sets contain the smaller stamp and it is a good stamp to begin with. You can always buy a different stamp later when you're not feeling the smaller one.

Scraper / Plastic Card

A scraper isn't necessary and, to me, not even worth buying. Most (starter) sets contain a metal scraper and this one can damage your plate, it scratches it. Polish floods in these scratches and that can make your design less neat. And not only that, it's also a pity to see pretty shiny plates with scratches. Instead of a metal scraper you can use an old plastic card or buy a plastic scraper.

Imageplates

Imageplates are metal plates with designs pressed it in. Most plates have about six or seven designs on them but this variates. There are full nail designs and smaller images available and the theme of the plates can be anything from flowers to animals to tribals: Everyone has something for their liking when it comes to imageplates! If you're starting with stamping and don't want to buy a starters kit I'd start with two or three plates just to see if you like it. You can always expand your stash later!

(Special) Polish

The reason I put the word 'Special' between brackets is that you don't need special polish to stamp. In fact, there are a lot of regular polishes that work just as well! However, most regular polishes aren't that pigmented as the special polishes and therefor they dry a lot quicker. When you are a stamping beginner I think it's smart to buy one or two special polishes, just to get the feeling. Konad offers special polishes and they come in three sizes: 5ml, 10ml and 12ml.

Fauxnad?!

Faux means fake, imageplates that aren't manufactured by Konad are often named Fauxnad. This doesn't mean the imageplates are of a lesser quality but there are some differences between Konad and Fauxnad plates: Fauxnad is larger and has bigger designs but no backing which means that the edges of the imageplates are sharp. Fauxnad plates can show some flaws such as a cut off edge but this doesn't affect the quality of the design. Keep in mind some people find it more difficult to use Fauxnads for stamping, if it doesn't work for you the first time it might work the next time.

Webshops that offer stamping products

OC Nail Art
Bundle Monster (via Amazon)
Chez Delaney
Boozyshop*
Enchantra*

* = EU
Boozyshop is working on her new webshop(!) - will be open again on September 1.


Pfew, this was part one. The next part will follow very soon! :-) I hope I helped some of you and let me know if you have questions or suggestions. Have a nice day!
Michelle

Roses really smell like boo-boo

Sunday, August 29, 2010
Hi guys! Last day of the weekend and hopefully the last day of that much rain! It has been raining almost non stop here and it's not only a mood killer, it's also kind of a swatch killer. So sun, please come back. I miss you dearly! Today's post is with a swatch that isn't the best evahhh but I want to show you anyway. I did another version of the roses manicure.

Roses Nail Art Design Freehand

I used Color Club Uptown Girl as my base colour and Ciaté Main Stage and H&M Love at First Sight for the roses. The roses are swirled so if you want to do this practice on a paper first because you don't want to mix the two colours together into one. The leafs are swirled too, I used OPI Here Today, Aragon Tomorrow and OPI Green-wich Village for them.

I see these designs coming up more and more lately and I really like them. Have you tried this once? If so, show me! I like seeing other versions of this kind of manicure. :-)

Thanks for stopping by!
Michelle

I like Dots

Saturday, August 28, 2010
Hey everyone! Glad the weekend started? I sure am! Today I'm showing you one of my all time favourite and easy manicure in a different way - a dotted manicure! Dots are very easy to make when you own a dotting tool (or a toothpick, also works) and sometimes I like to do it a little different. You've seen me putting rhinestones on dots and now I used round shaped pink glitter from Viva La Nails for this dotted manicure. It's not special, it's not difficult but it sure is fun.

Eyeko Posh Polish Round Shaped Pink Glitter Viva La Nails Nail Art Dotted Manicure

The polish I'm wearing is Eyeko's Posh Polish, a pretty taupe that is opaque in two coats. Like the other Eyeko polishes I tried this one applied nicely, the polish is not too thick nor too thin. I love how pink and taupe combine together, it's definitely one of my most favourite colour combination.

What are your favourite colour combinations?
Have a great Saturday!
Michelle

Eyeko Posh Polish is provided by Eyeko for consideration. For more information read my disclaimer.

Purple Marble

Friday, August 27, 2010
Hi guys! I did a water marble today and I really enjoy doing them. I hate the clean up though, to me that is probably the most awful thing I've ever done clean up wise. It doesn't matter what method I try, it always looks super messy (so I never show them). I used vaseline today, using a small paintbrush to greasen up my cuticles and guess what.. No more terrible clean up, NO MORE! Vaseline is my new hero for doing this stuff - I could swipe all the excess polish off with a brush.

As far as the marbling, I like the really neat patterns but I enjoy the crazy swirls more because of the difference in patterns. So for the first time on my blog, finally, a marble.

Watermarble Marble Purple Orly Lollipop Zoya Yasmeen Nail Art Nail Design

I used Zoya Yasmeen and Orly Lollipop for the marble. Excusez moi for the bad quality of the picture but it has been raining non stop which means craptastic lighting. Now, I could do a tutorial about marbling but you really want to see the queen of marbling do it: Colette from My Simple Little Pleasures. She has a lot of handy tutorials up so if you want to know more about marbling I highly recommend you visit her site (and youtube channel). :-)

What's your take on marbling? Do you like it or not?
Michelle

Essence Nail Art Pens

Thursday, August 26, 2010
Hi all! A few months ago Essence has released a new line of products that can be used for nail art creations. You can find nail jewels, various stickers, a nail art sealer (special top coat), stripers and many more. Not that long ago Essence added something new to this nail art line, including these nail art pens. I was very excited when I heard these pens coming out because what is easier than creating your nail art with a pen instead of a striper?! The nail art pens are available in six different colours.

Essence Nail Art Pens Review Nail Art Freehand Pens

The colours:
- Spacy Pink
- Cool Black
- Deep Purple
- Juicy Orange
- Silver White
- Silver Star

Before you use a pen you shake it, press the tip a few times down and out comes the colour!

Essence Nail Art Pens Wheel

As you can see above I've tried out the pens on a nail wheel. There are three that absolutely stand out for me: Cool Black, Silver Star and Spacy Pink. These are pigmented enough to give you an opaque result without any effort. The other ones are watery and show streaks, kind of a let down! However, there's a big plus for all of them: they dry quick and they don't smudge when applying top coat.

Essence Nail Art Pens Review Nail Art Freehand Pens

Here's a manicure I created with all pens just to try another design with them. I think these pens are handy to create dots with but once you use them for stripes and other artsy fartsy stuff some of them lack in what they promise because of the watery formula.

These pens are available at Kruidvat, a Dutch drugstore, for €1.99. For this price you can buy every single one of them but really, I'd only go for Cool Black, Silver Star and Spacy Pink. These are definitely the best out of the bunch.

Have you tried these or would you want to try these? What's your thought on them?
Thanks for stopping by!
Michelle

Nail Art Tutorial: Striped!

Wednesday, August 25, 2010
Hi everyone! As promised the nail art tutorial of my striped manicure. :-)

Striped Manicure Nail Art Stripes Tutorial How To Striper Zoya Ivanka Veruschka OPI Damone Robers 1968 Green-wich Village Essie Pretty Edgy

First of all, pick the colours you want to use. If you do this while working on this manicure (and you are terribly clumsy) you will have a chance of ruining your manicure and we don't want that to happen! I have used: Essie Pretty Edgy, OPI Green-wich Village, OPI Damone Roberts 1968, Zoya Ivanka and Zoya Veruschka. I'm someone who wants their colours to match otherwise I'll start to annoy myself but do whatever you like! :-)

The other thing you need for this manicure is a striper. You can use a small brush for this or a striper brush. Striper brushes can be bought apart or in a nail art brush set. Mine has gone to heaven a while back so I cleaned out a striper polish I never used and I took that striper brush.

Striped Manicure Nail Art Stripes Tutorial How To Striper Zoya Ivanka Veruschka OPI Damone Robers 1968 Green-wich Village Essie Pretty Edgy

Make sure you clean it right after you've used it, otherwise you'll mix up polishes. You can use a cotton pad soaked in polish remover for this.

Now, on to the manicure. After you have applied your base coat, apply your base colour. I chose OPI Green-wich Village as my base colour, a very fresh green. You can wait for it to dry but I'm always kind of impatient so I continue right away with the next step.

Before you start keep in mind you don't want too much polish on your striper. If so, than can turn runny and become a droopy mess on your nail. Is your line too sheer? Wait a minute and pull another line on top of the first.

1. Take a polish and dip your striper in it. Pull a vertical line from the bottom of your nail to the top. I've created one stripe on the left side of my nail with Zoya Veruschka.

2. Repeat step 1. I created two lines on both sides of my nail with OPI Damone Roberts 1968.

3. Again, repeat step 1. I created one line on the right side of my nail with Essie Pretty Edgy.

4. And for the last time, repeat step 1. I created two lines on both sides with Zoya Ivanka. After that you seal it with a top coat.

If you don't like to read, here's picture material. You can click on these for an enlargement:

Striped Manicure Nail Art Stripes Tutorial How To Striper Zoya Ivanka Veruschka OPI Damone Robers 1968 Green-wich Village Essie Pretty Edgy Striped Manicure Nail Art Stripes Tutorial How To Striper Zoya Ivanka Veruschka OPI Damone Robers 1968 Green-wich Village Essie Pretty Edgy

And the result:

Striped Manicure Nail Art Stripes Tutorial How To Striper Zoya Ivanka Veruschka OPI Damone Robers 1968 Green-wich Village Essie Pretty Edgy

Done! Easy nail art that everyone can create. If your hand isn't that steady make sure your wrist rests on something, like a table. This way your hand doesn't shake that much. I hope this was helpful for you!

Have a great day!
Michelle

The Nightmare Before Christmas

Tuesday, August 24, 2010
Hey all! Did you survived your Monday? :-) There are a few things I want to do nail wise and one of them was making Jack Skellington on my nail. I absolutely love the movie 'The Nightmare Before Christmas' and since Jack is my favourite animated movie character the choice was easily made.

Jack Skellington Nail Art Nightmare Before Christmas Nails Freehand

I used Diamond Cosmetics I'm Raven About You as my base colour, my favourite black because it's opaque in two coats (I don't own one that does the same without leaving streaks.. hmm) and Jack and the stitches are made with H&M Love at First Sight and a striper. Why I did stitches? I don't know but I didn't want to leave my nails blank - next time I'll try a full Nightmare Before Christmas manicure.

Have a nice day!
Michelle

Green Zebra

Monday, August 23, 2010
Hey everyone! How are you all doing today on this Monday? Hopefully the week started good for you. I haven't got a lot to show or tell you today so I think it's better to have a look at the manicure I'm wearing now. :-)

Nfu.Oh #569 Zulu Dupe Nfu.Oh #66 Holographic Regular Polish Stamping Konad Imageplate M57 Zebra Design Nail Art

Remember the holographic zebra I did a while back? This is also a holographic zebra but with a different holo. I'm wearing Nfu.Oh #569 as my base colour and Nfu.Oh #66 as my holo. The zebra design is from Konad Imageplate M57.

I have to say I am liking to stamp with holo's more and more every time I use them so really, try it once for yourself! Oh and before I forget: the stamping polish database has grown a lot and you all have given me lots of additions for the list. Thank you very much! :-)

Thanks for stopping by!
Michelle

Herôme W.I.C. Graffiti Nail Art

Sunday, August 22, 2010
Herôme World Inspired Colours Graffiti Nail Art Review

Hi guys! A while back Herôme brought a new line to their already existing World Inspired Colours Collection: Graffiti Nail Art! This line is based on graffiti and other modern arts and all the polishes are named after hip, artistic districts in the city New York such as East Village Manhattan and Brooklyn. The Graffiti Nail Art line is very similar to other stamping products and they also offer a scraper, stamp, stamping polishes and plates.

As you can see above the products arrived very nicely. Every single set is packed in a very pretty holographic box with a bow on it. You can't go wrong with holographic! :-)

Herôme World Inspired Colours Graffiti Nail Art Review

Sets

I received the Get Started kit as well as three sets of plates, called Fancy, Say It! and Tips. Herôme only offers sets of plates; you can't buy these single. You also have to buy the Small or Get Started kit if you want to have a stamp and scraper. The polishes can be bought alone. I like the idea of sets but I think it would be even more handy if all plates and the stamp and scraper were also sold single. That way you can see for yourself what you'd like to receive and, for example, not end up with a plate you never use.

Get Started Kit

The Get Started Kit contains a scraper, a stamp, three plates (B41, B77 and B44 - the set is called Flowers) and three special polishes: red (Soho Manhattan), black (Brooklyn) and white (Lower Manhattan). Like the name already tells you, this is a starters kit. I think this kit has everything you need to get known with this product but if you think it contains too much there's also a smaller kit called, very surprising, the Small Kit. These kits also contain a little guide with examples how to use everything.

Herôme World Inspired Colours Graffiti Nail Art Review

Plates and Stamping

As you might have seen the plates Herôme offers look a lot like Konad plates. Some designs are the same as the designs on Konad plates, others aren't. This isn't necessarily a bad thing: €7.50 for three plates makes a good, cheap and easy to reach "Konad dupe". You use the plates the same as the other stamping plates around: you put polish on the plate, use the scraper, use the stamp and place the design on your nail. The Herôme plates work good and there's no trouble here with picking up the designs. For a how to check out their site!

These plates don't have a backing and that means that you should be careful because they are sharp! The ridges can easily cut your fingers. The scraper is from metal and if you press too hard it can damage your plate so be careful with that. I'd love to see a plastic scraper that comes with it.

Herôme World Inspired Colours Graffiti Nail Art Review

Polishes

Hey, how sweet is this? Not only can the polishes be used for stamping, they're also stripers! Now I love this because I'm a BIG fan of stripers. These stripers have long, thin brushes and the cap is easily to hold. I want more of them!

Using these polishes for stamping also works fine. They are thinner than other stamping polishes so if you're starting with this form of nail art you might have to practice a little longer. Also the polishes aren't in your face pigmented - they are pigmented enough but still look a little 'faded'.

Herôme World Inspired Colours Graffiti Nail Art Review Herôme World Inspired Colours Graffiti Nail Art Review

Designs

As you can see above I've made two designs. The first design is made with plate B44 and Lower Manhattan. The second design is made with Soho Manhattan and Brooklyn. You can click on these for an enlargement.

I used a regular black and white polish as my base for these two manicures because I don't own cremes from Herôme. The nail jewels aren't from Herôme.

Details

The W.I.C. Graffiti Nail Art products are exclusively available at Herôme's webshop. The Get Started Kit costs €24.95, the plates per set costs €7.50 and the polishes are available for €7.50.

Herome is being sold in Germany, France, Belgium, Switzerland, Denmark, Austria, Australia and New Zealand. The Herôme products are distributed by wholesalers, drugstores, perfumeries, beauty salons and the internet.

These products are provided by Herôme for consideration. For more information read my Disclaimer.

Saving Preppy Pink

Friday, August 20, 2010
China Glaze Preppy Pink Nail Polish Thinner Restoring Thick Polishes P2 Restore

Hi guys! Since I'm not a pink fan at all I only look once or twice a month (or less!) at my pink polishes. A few days ago I took out China Glaze Preppy Pink, a really sweet pink with opalescent glitters. I remembered that Preppy Pink was on the thick side but it didn't matter because unlike most glitter polishes, this one was way more opaque.

China Glaze Preppy Pink Nail Polish Thinner Restoring Thick Polishes P2 Restore

Hey, it wasn't this thick! I own this polish less than one year and I haven't done anything crazy with it. I keep it in my Helmer and the cap is always screwed on tight. It is so thick you can use it as glue to paste tiles to the wall.

The brush is laying down on a piece of paper so yes - the polish drop doesn't even move when it is in this position. How weird is that? This really got me surprised because I've really never seen a polish that thick. Have you?

China Glaze Preppy Pink Nail Polish Thinner Restoring Thick Polishes P2 Restore

Of course I had to try it on my nail. It was almost impossible to paint my nail with it, it was hard to apply it in a normal way on my nail and the gritty finish has turned into a lovely wobbly lumpy finish. Good news is that it was even more opaque and I only needed ONE coat! :-D

But then I got a idea. Would I be able to save Preppy Pink and return it to it's normal functioning state again?

China Glaze Preppy Pink Nail Polish Thinner Restoring Thick Polishes P2 Restore

My friend for this task is polish thinner. I own two polish thinners, the P2 thinner and Seche Restore. Seche Restore contains toluene so it's not B3F (China Glaze is) and therefore I chose the P2. Do NOT use polish remover because that KILLS your polish!

Normally you use three or four drops but for Preppy Pink I've used quite a lot more - I didn't count but it was a lot. I shook the bottle and leave it to rest. The result?

China Glaze Preppy Pink Nail Polish Thinner Restoring Thick Polishes P2 Restore

1: The non-thinned Preppy Pink
2: Preppy Pink right after being thinned
3: Two days later (like Preppy Pink used to be!)

And so polish thinners saves the day once again. Preppy Pink is now, two days later still good - I hope he stays this way. And remember: don't throw away thick and/or old polishes. You can fix them and if you do not want to fix them, send them to me haha. It's such a waste throwing polish away!

Have a nice day!
Michelle

Stamping Nails: Tips & Tricks

Thursday, August 19, 2010
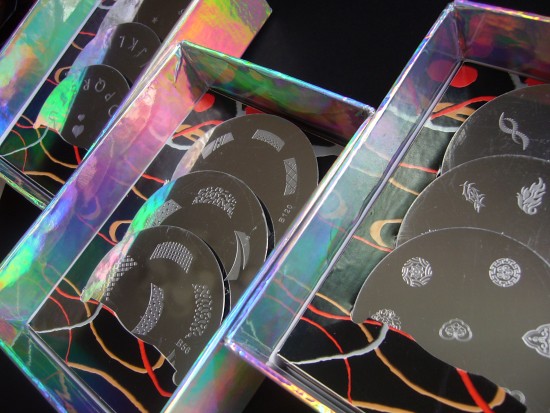
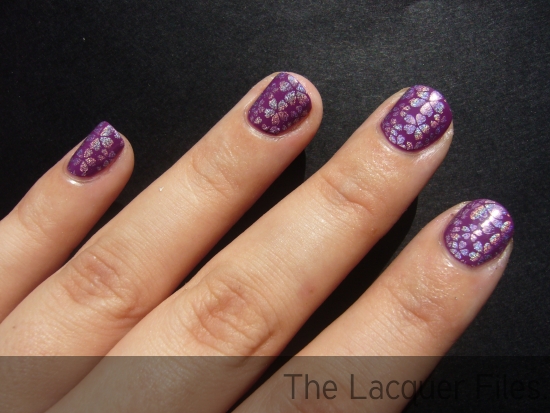
Hi everyone! I wanted to share a few tips and tricks with you for Konad, Fauxnad and Bundle Monster. I'm really liking all the things you can do with it and it's great if you want a nice pattern on your nails and you don't have the time or patience to do something freehanded.

Konad Tips and Tricks Nail Polish Fauxnad Bundle Monster Stamping

Basics

First I'd like to tell you that stamping isn't hard, difficult or it takes a lot of your time. A lot of people think so but trust me when I say it isn't. Once you know the basics of stamping you're good to go and you can expand your knowledge and skills. If you want to learn the basics I really suggest you read the how to: Konad on Lacquerized.

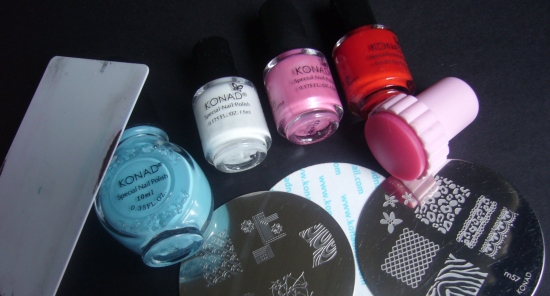
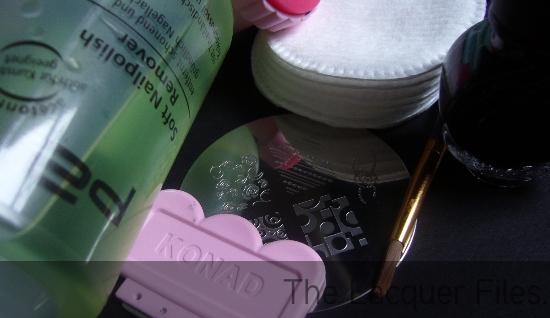
Know the basics? Before you start, make sure you take everything you need and put it in front of you. If you do this you'll minimize the chance of ruining your manicure or do something foolish like throwing acetone over your laptop (true story - he's fine now). Can't remember what you needed? Here's a list:

Stamp, scraper, plate, (stamping) polish, polish remover, q-tip / clean up brush, cotton pads.

After collecting everything you can start with it. Do the thing you always do or follow a how to, as long as you like the result it's good! Now, a few tips and tricks I think are always good to know.

Konad Tips and Tricks Nail Polish Fauxnad Bundle Monster Stamping

Base

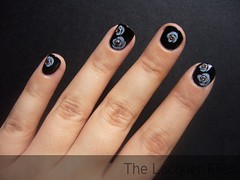
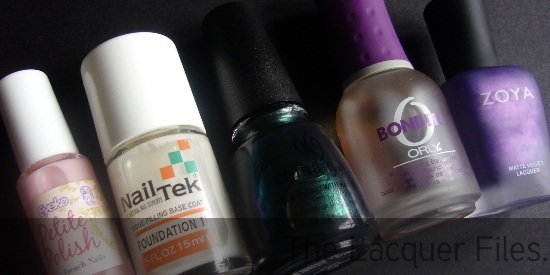
Sometimes you want to use a colour as the 'background' for your design. Always apply your base coat to prevent staining and once you're finished applying the desired polish you can use a quick dry top coat over it. I prefer this because that way I'm sure the polish has dried properly. If it's still wet or dry to the touch you can cause wrinkles when you're using the stamp.

Another great thing about applying top coat over your base colour: you can remove mistakes easily. Use a cotton pad with polish remover and swipe over your nail. You'll notice the colour will lose it's glossiness but this will return once you've added another layer of top coat.
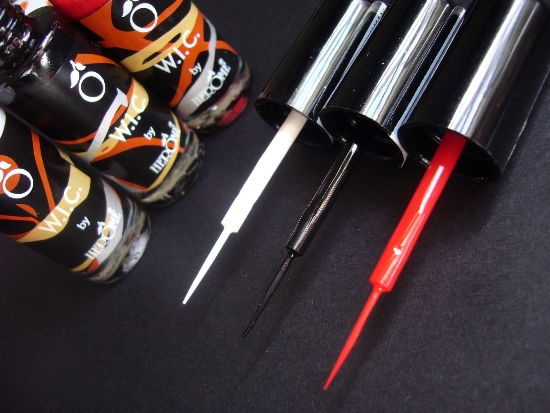
Konad Tips and Tricks Nail Polish Fauxnad Bundle Monster Stamping

Stamping Polishes

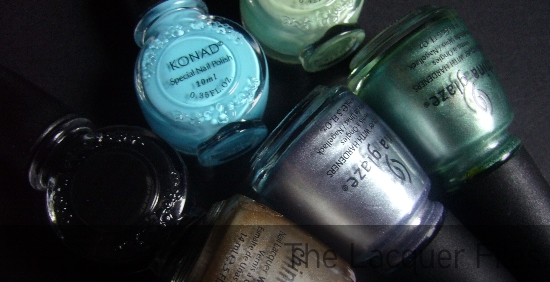
A lot of people don't know you can stamp with more than the Konad stamping polishes. The plus of using the special stamping polishes is that they are thicker and dry slower so you'll have more time working with the stamper and applying the design. Most of the Konad stamping polishes are also very pigmented.

I am working on a stamping polish database and there are a lot of regular nail polishes you can stamp with. The most important thing of working with regular polishes is that you must be quick. They dry much faster!

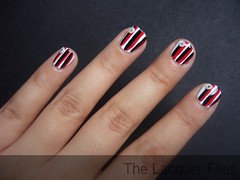
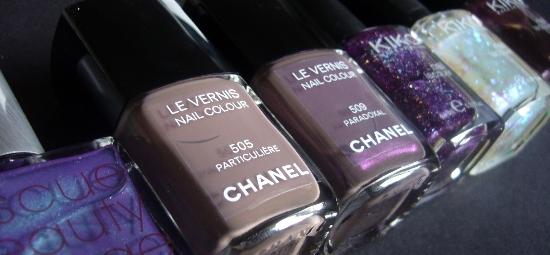
The most popular regular polishes used for stamping are the China Glaze Khromes and Romantiques. These polishes are easy to work with and are very visible on your nail.

Konad Tips and Tricks Nail Polish Fauxnad Bundle Monster Stamping

Keeping Yourself Clean While Stamping

Stamping can be a messy situation. Sometimes the stamping polish ends up all over my arms or in my hair (I'm clumsy) but you really want to avoid that - it sucks scrubbing all the polish off and having the chance of ruining your manicure.

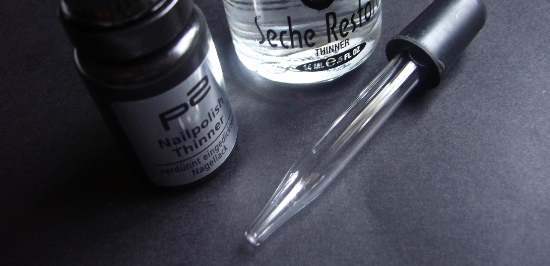
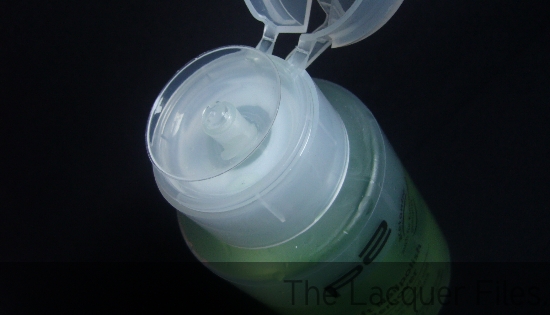
I always keep a cotton pad and nail polish remover next to me so I can clean up the plate, scraper and stamp right after I used it. I clean everything after doing one nail. Not only does this prevents you making a mess, it also gives you a neater design. I prefer a flipper bottle like the Zoya Remover + Big Flipper or the P2 Nail Polish Remover. That way you can just push onto the cap instead of taking the cap off all the time.

If you're afraid of messing up your manicure, use tweezers to grab the cotton pad soaked in acetone. If you're not afraid, just be careful when you're picking up the cotton pad. :-)

Konad Tips and Tricks Nail Polish Fauxnad Bundle Monster Stamping

Clean Up After

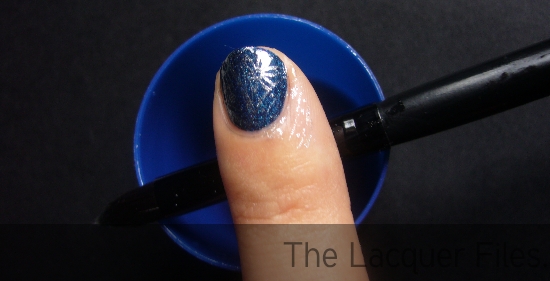
Once you've stamped all your nails you want to clean them. Most of the designs are quite big (for smaller nails) and you will stamp over your fingers and cuticles. I use a clean up brush but you can also use a q-tip. Dip it in polish remover and remove the polish that isn't on the right place! After that you're done and you can apply top coat to make your design smooth and glossy.

Special stamping polish is very pigmented. When removing this make sure you don't push the remover and polish towards your cuticle - this can cause staining and/or polish dragging. This is also something to remember when you're doing a regular clean up.

Top Coats

Konad offers a special top coat that prevents smudges and dries to a high gloss protective finish. The reason this top coats prevents smudging is because it's a little thicker than most top coats. However, the thicker your top coat is, the more chance you'll smudge the design: make sure your top coat is in perfect condition! You can also use the Konad top coat as a normal top coat. One side note: I've heard Konad top coat starts to thicken up quickly but you can thin it.

I've never used the Konad top coat so I can't compare anything but I have found other top coats that don't smudge your design. Nubar Diamont Seal & Shine, Seche Vite and OPI RapiDry are three top coats you can use. These are a little thicker than most top coats and they are fast drying.

Applying top coat has to be done gently - always! Make sure you apply it in a floating manner so the brush doesn't touch the nail. If that happens the brush can drag polish or smudge the design. Be careful with thin top coats, they smudge the design more quickly.

Help. I Fail.

No, you're not. Stamping takes a lot of practice as well as perseverance. You can practice on old manicures, friends, a closet, your toes - whatever!

If practice doesn't make perfect, here are a few random tips:

- Make sure you've removed the plastic off the plate the first time you're using it! :-)

- Roughen up your stamp by using a medium file. This way the stamp picks up nail polish better.

- A scraper can damage your plate, use an old plastic card instead. If the plate is damaged, polish will stay behind in the scratches.

- Use polish remover that contains acetone. This removes all oils on the plate, stamp and scraper which helps you creating a neat design.

- Don't press like you're life depends on it, this way you'll mess up the design. Press gently in a circular movement.

- Stamp quickly. If you don't, your stamp can slide and this creates a crazy looking double or messy design.

- Take your time, especially when you stamp for the first time. If you want to hurry it will fail. Really, it will!

Stamping isn't rocket science! Let me know if you have other tips or if these tips helped you! You can also ask other questions, I hope I can help you out. :-)

Horror Nail Art Contest: The Winner!

Wednesday, August 18, 2010
Horror Nails Nail Art Design HM Love at First Sight Orly Poison Apple

Hi guys! First of all I'd like to thank everyone that has taken the time to vote in the Horror Nail Art Contest - and there are a lot of votes! Almost everyone shared some thoughts and they were so kind! A lot of people found it difficult to choose a winner because they thought all the manicures were amazing and very creative.

A few comments on the one that won:
EW! That means it has achieved the proper effect!
I want to wear this next Halloween!
These are the most scary I've seen in a while.
They are horrific!
Almost real!

The manicure that won, is Thifa's manicure!
Congratulations Thifa, please contact me with your address! :-)

I'd like to thank everyone that has participated. You guys were so creative and you made me want to do my own horror manicure! :-)

Horror Nails Nail Art Design HM Love at First Sight Orly Poison Apple

I'm wearing H&M Love at First Sight and used Orly Poison Apple for the blood.
Thanks for the inspiration and have a nice day!

I'm back!

Tuesday, August 17, 2010
Hey everyone! I returned home yesterday from vacation. There is really not much to tell about it except the weather was nice, the food was good and I had great company. We've done quite a lot: visited the city nearby the camp site, went to Germany and we had the party of our life - if you follow us on Twitter you've probably seen the pictures. Apart from being busy we relaxed a lot and our friends Natasja and Janina stopped by. If you're interested in seeing some pictures you can click here. It's a small impression of the vacation.

Now, polish wise I didn't know I bought so much until I packed out my polish box yesterday. I thought I was kind of in control but apparently not. Since it's a polish blog I'll show you what I got.

OPI DS Glamour Nfu.Oh #65 Nfu.Oh #66 GOSH Holographic Holographic Nail Polish

Michèle got me the sweet Nfu.Oh's (#65 and #66) and Daph brought me OPI DS Glamour (finally!). GOSH Holographic was bought during a shopping spree in a Dutch drug store.

Catrice Poison Me, Poison You Fiep Westendorp Hema Collectie Jip & Janneke Nail Polish

Catrice Poison me, Poison You is a pretty purple. Then we have two polishes from the Fiep Westendorp collection (sold in a Dutch drug store - an artist and pretty much my childhood hero) and last but not least a small LE from Manhattan.

Rescue Beauty Lounge RBL Scrangie Chanel Paradoxal Les Contrastes des Chanel 2010 Limited Edition Chanel Particulière Kiko Nail Polish

Michèle brought me Scrangie and Natasja brought me Paradoxal. The Kiko polishes are adorable and very pretty (great price too - €1,90!).

MNY Maybelline #549 Pieces Parisian Mints H&M Blue Sky Grey Sky Love at First Sight Nail Polish

And last but certainly NOT least: MNY, Pieces and H&M, all from Germany.

I like the things I bought but I didn't know it was that much. I'm not the only one though because I've been reading the secrets from the ones who have entered my giveaway and it's a common problem - makes me feel less silly. :-)

Now I'm going to unpack everything that hasn't been unpacked, I'm still kind of lazy. Shh.
Have a nice day everyone!

Pink & Grey Holo

Monday, August 16, 2010
Hey everyone! It's Monday and that means the week is starting all over again but it also means that I'm coming home from vacation today! I always like coming home after a while and be able to sleep in your own bed, have your own stuff around you and all of those small things. I guess you understand what I mean. :-)

The last scheduled post is, how surprising, a holo post.

Pink Grey Holo Shade

I first painted my nails with Color Club Fashion Addict, a really light pink holo. After that I stamped with Bundle Monster plate 19 and Color Club Revvvolution. These polishes also work very well for stamping - maybe I should create my own database of good stamping polishes on the blog haha. In the shade, as you can see in the picture above, it is nice but not special.

Pink Grey Holo

Much better when the sun is out, don't you agree? :-)
Thanks for stopping by and I'll be talking to you soon!

Fairy Flowers

Sunday, August 15, 2010
Hi guys! How was your Saturday night? I hope it was good! A while ago I stamped with OPI Russian Navy, the first time I ever stamped with a matte/suede. I really liked the effect and so I wanted to try it again, only with a different polish.

For this manicure I used ManGlaze Matte is Magic as my stamping polish. It did work however it wasn't black (more greyish) and a little thin. If you want to try this yourself: be fast! Mattes and suedes dry very quick.

Fairy Flowers

I used H&M Love at First Sight as my white base colour. I'm really satisfied with this white polish because it's super pigmented and I only need two coats but it's really thick. I need to remind myself to thin it! So the stamping is done with ManGlaze Matte is Murder and Konad imageplate M73. After that I topped it off with China Glaze Fairy Dust.

Fairy Flowers

It doesn't show that well in pictures but Fairy Dust is really a nice addition. It's so sparkly  and I love holographic glitter! 

Thanks for stopping by!

New: Stamping Polish Database!

Saturday, August 14, 2010
Hey everyone! I've been a busy bee and started with an idea I've had for a while: creating a stamping polish database. Using regular polish is a nice addition to the whole Konad, Fauxnad and Bundle Monster experience and therefore I created this database.

Special thanks to Sasse's Stamping Stampede for the already huge list of regular stamping polishes and dearie Michèle for putting tabs and a table on my blog.

You can find the Stamping Polish Database here!

If you have any questions, suggestions or additions you can always send me an email, tweet or leave a comment. Let me know what you think! :-)

Striped - Blue!

Friday, August 13, 2010
Striped - Blue

Good morning everyone! Last Sunday I showed you a striped manicure and today I'm showing you another one but with different colours. I'm liking this one a lot more but that might be because blue is my favourite colour.

Striped - Blue

I used MAC Blue India as my base colour, a gorgeous dusty blue. After that I made stripes with China Glaze For Audrey, 2030 and Atlantis. I think these colours combine very well together and this has to be one of my favourite manicures ever. What can I say? - I just really like stripes (and blue!). 

How do you feel about striped manicures like this?

Something Sweet

Thursday, August 12, 2010
Hey guys! After that messy manicure yesterday it’s time for something more sweeter and neater. Like I said before, I’m really loving to stamp with holographic polishes these days and I can’t believe I tried it earlier! Foolish! But it’s summer and there will be plenty of sun (and time) to create more of my new favourite konadicures.

OPI Pamplona Purple stamped with Bundle Monster Plate 16 and Nfu.Oh #64

In the shade it isn’t that much. It shows a little holo though, but what do you expect when wearing a crazy holo like Nfu.Oh #64?! The flower design is from Bundle Monster plate 16 and the polish I used as the base colour is OPI Pamplona Purple.

OPI Pamplona Purple stamped with Bundle Monster Plate 16 and Nfu.Oh #64

WHAM! POW! Sorry I’m kind of exaggerating now because this picture really doesn’t show the true holo that it contains. I’ll swatch the Nfu.Oh a little later and my camera hopefully will catch the insanity. Because that’s what it is, INSANE!

Have a nice day!

Messy Konad

Wednesday, August 11, 2010
Good morning all! Today I want to show you a Konad design that I consider messy. I don’t know what else to call it – paint dribbling down my nails seems not the right explanation.

ManGlaze Matte is Murder stamped with Konad Imageplate M70 and China Glaze 2030

See what I mean? It’s just messy. I like it!

My base colour is ManGlaze Matte is Murder, the best matte black nail polish everrrr and I’ve stamped with China Glaze 2030. The plate I used is Konad plate M70.

How do you feel about ‘messy’ designs like this?
© The Lacquer Files | Disclaimer | Want to use my content? Email me first!

This work is licensed under a Creative Commons Attribution-NonCommercial-NoDerivs 3.0 Unported License.